Pages

Wednesday, October 2, 2013

Crash Design - 5 hour Bedroom Makeover

When my best friend's mom approached me with a design challenge to help her overhaul her bedroom that had been in the same state for 35 years in one afternoon, I just felt I had to do it! With a very small budget and a limited window of time (because she has to care for her autistic daughter), I -with the help of my friendly movers transformed a dusty and cluttered room into a book haven and prayer sanctuary.  I'm pretty excited about what we were able to achieve so quickly but i'm even happier that she was over the moon about her new room.
Before: I had asked her to remove most of the clutter and items in her room before we began since we had such a small amount of time.

After: The only design instruction she gave me was that she loved this shade of green. I took that and off I went to Target (I LOVE TARGET... thank you for coming to Canada finally!!!!), Ikea and Homesense to pick up what I could to compliment the green. I came up with a relaxing palette of greys, blues, and a surprise pop of red (the bookshelf is from Target). The old carpet was removed to reveal hardwood floors in perfect condition!
The hardwood floors are cold in the winter, so I found this gorgeous grey floral rug. I also put together this desk and chair for her, and had ikea floating shelves on top. Even though the curtains aren't floor length (which are ideal), I found these ready-made curtains from Homesense for $24.99/pair!

Tiny Bathroom Reno in the Upper Beaches - Maximizing Space & Personality!

The last post was about a basement project of a 3200 sq. ft home, where space was definitely NOT an issue. This post is about a one week bathroom reno in which we had the opposite problem. The bathroom itself was only about 36 sq. ft.- almost half of which was taken up by a tub. The size itself was a challenge because it had to be fully functional for a growing family of 4 (it is the only bathroom on the floor of the bungalow). In addition, it was dated and lacked the fresh design the client wanted.
Bathroom Before -
Dated & cramped!


After: A fresh and vibrant space! We removed the wall tiles (which I felt cut up the room and made it look smaller) and had the walls painted a punchy shade of yellow green.  Since the client needs to bathe two small kids, we maximized the floor space by installing the Ikea Lillangen Sink with wall brackets. An Ikea extra tall wall cabinet was installed on top of the toilet to take advantage of the wall height and create vertical storage space.


(Above) View of the hexagon tile floors from The Tile Store. I like using smaller mosaic tiles in small bathrooms because it adds character and texture. The space wont end up feeling too busy since it's so small. You can really play around with colour and texture in small spaces in ways you couldnt in large bathrooms.

 
(Above): The client was given the brown accent tiles for free, so we incorporated it into the design. I chose a white matte 4x16" tile, which we did in a stacked pattern as the backdrop. The shower curtain, which incorporated shades of yellow, grey and brown is from West Elm. The shower kit with a rainfall showerhead and hand shower spray is from Tubs.


Basement Reno- Planning and Finishing Large Spaces

Planning and finishing large areas of space can be just as difficult as figuring out to do with small ones, so for this post about our latest project, i'm going to focus on how we planned the space. Like most unfinished basements, we start with the basics of what we know: where the furnace, ductwork, supporting beams, windows and plumbing are. Though we can move latter, most things on that list are untouchable.

We then start to design the basement based on the needs of the client, and get a vision for the finishes that they want to see in their dream space. For this particular project the list of requirements were standard: a bedroom, bathroom, a large furnace room and a rec room. The construction and finishes, however, were mostly upgraded: spray foam insulation throughout (which we subcontracted out to Insta-Insulation prior to the contractors starting), DRICore Subfloors, Roxul sound insulation in the ceilings and walls, solid three panel doors, 5" baseboards, and other upgrades you'll see throughout.
 

As much as I would have loved to show you the finished space in its entirety, the client moved everything downstairs so quickly that I didn't have a chance to come and take photos. I take that as a compliment- since that means that they were so eager to use it!

We'll start the tour at the bedroom (which is now being used as an office so i'll respect the client's privacy there). We had two frosted glass doors installed at the entrance. To maintain the flow of traffic, there is another main coridor that is not shown.
Bedroom Before

The rec area in the basement is a lot larger than this space, but I wanted to crop out most of their personal items. On top of the DRICore subfloors, we had the contractors install this gorgeous Classic Plus laminate from Quick Step, in Midnight Oak. It's micro-bevelled, so you get the look of wood flooring. The clients had a few people ask if it was engineered hardwood.
For lighting, the client wanted less focused lighting so we opted for three flushmount fixtures in combination with pot lights.

Another view of the rec area


Stairs Before
(Above) The stairs are now faced with oak treds and risers that are stained to match as best as possible with the multi-coloured laminate.


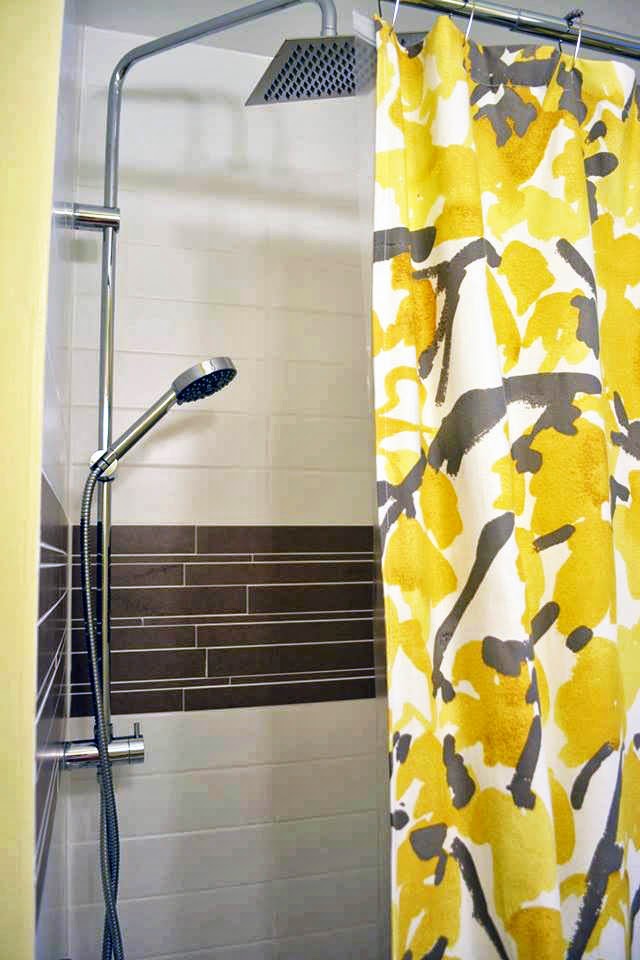
Bathroom/ Furnace Rooms
before
(Above) - The bathroom was a very large space, so I sggested the idea of adding a listello (band of accent tile) on the floor instead of just in the shower stall.

The glass shower featured the same accent tiles, with a Kohler shower system. We had the contractor create a niche for the shampoos and soaps, which also helped break up the large space visually.